New to 4MLinux?

If you are a new 4MLinux user, you should jump here


Pages

Saturday, April 13, 2013

BakAndImgCD

BakAndImgCD is a very small (about 20 MB in size) Linux-based operating system, which has been designed to perform the following two tasks: data backup (the supported filesystems are: btrfs, ext2, ext3, ext4, f2fs, fat16, fat32, hfs, hfs+, jfs, nilfs2, ntfs, reiser4, reiserfs, and xfs) and disk imaging (using Partimage, Partclone and GNU ddrescue). The output files (archives and images) can be optionally compressed and sent to a remote FTP/SFTP sever (via Ethernet, WiFi or Dial-up interface).


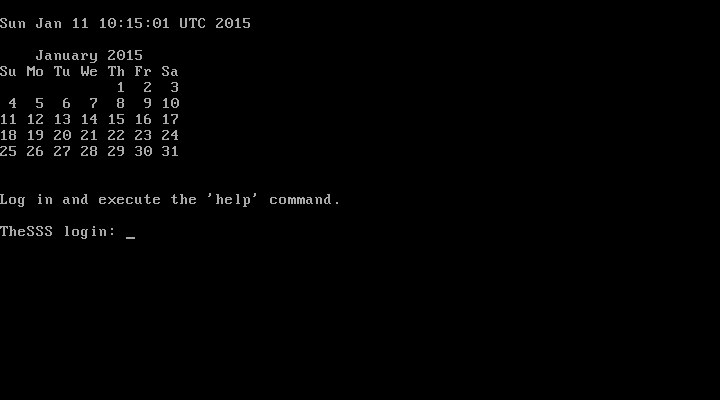
1) Boot your copy of BakAndImgCD:


2) Once it has booted, you can log in as 'root' using password 'root':


3) After executing 'help', you will see the following screen:


4) Let's have a look at some main commands now.

'backup' (manual backup of selected files)

'fsbackup' (automatic backup of all files)

'image' (creation of disk images)

'netconfig' (see: this post)


5) List of disk imaging utilities included in BakAndImgCD.

Partimage:


GNU ddrescue:

NOTE:
Partimage is (in my opinion) the best, but it does not support ext4 and btrfs filesystems. Partclone in BakAndImgCD is setup to create 'raw images', meaning that any kind of partition can be imaged. GNU ddrescue should be applied in case of read errors (to rescue data from partitions with bad blocks).

6) Additionally, BakAndImgCD has Midnight Commander (file manager), Links (text-based web browser), and cfdisk/cgdisk (simple MBR/GPT partition managers), which can be very helpful in some cases:


Sunday, March 3, 2013

TheSSS

TheSSS (The Smallest Server Suite) is a lightweight server suite distributed as a live CD. It is designed for system administrators who need a very tiny set of server software for small local area networks. The supported servers are FTP, HTTP, SFTP, SSH, and Telnet. A proxy server (Polipo) with the Tor anonymizer is also included. The main security components are a 4MLinux Firewall (based on iptables) and Clam AntiVirus. TheSSS tries to follow the KISS principle as it was shown in this post.
 
Notes: TheSSS boots in the same way as 4MLinux does (this was described here).

1) Boot your copy of TheSSS:


2) After executing 'help', you will see the following screen:


3) Let's try the 'server' command now:


NOTES: 
There are some links at the bottom of this page. Follow them to learn more about particular servers included in TheSSS.
If you need to configure your Internet connection, you should run the 'netconfig' script (the procedure is very similar to the one described here).


4) Additionally, TheSSS provides antivirus protection, which works in the exact same way as it was shown in this post.


5) The installation of TheSSS to a hard disk drive can be performed by running the 'install2hd' script (have a look at this guide).


6) TheSSS has Midnight Commander (file manager) and Links (text-based web browser), which can be very helpful in some cases:


NOTES: 
TheSSS is able to make a backup of your data (and to send it to a remote FTP server if desired). Just try it yourself by executing 'backup' and 'fsbackup'  commands! 
TheSSS is also able to display a huge number of information about your system. You can view them after executing the 'nmonitor' command.


Further reading:
FTP - HTTP - SSH - TELNET - FIREWALL - PROXY - MONITORING

Tuesday, February 5, 2013

Antivirus Live CD

Antivirus Live CD is a 4MLinux fork including the ClamAV scanner. Both Ethernet (including Wi-Fi) and dial-up (including fast USB modems) Internet connections are supported to enable automatic updates of the virus signature database.

1) Boot your copy of Antivirus Live CD (or Antivirus LiveUSB):


2) Once it has booted, you can log in as 'root' using password 'root':


3) After executing 'help', you will see the following screen:


4) And after executing 'antivir', you will see this screen:


5) It is highly recommended to update virus databases:


NOTE:  
If you need to configure your Internet connection, you should run the 'netconfig' script (the procedure is very similar to the one described here).


6) And finally, when the update process is over, you can start the ClamAV scanner:


NOTE:
Antivirus Live CD will check all your disks against viruses. This is possible because all partitions are mounted automatically during boot so that they can be scanned by ClamAV (the supported filesystems are: btrfs, ext2, ext3, ext4, f2fs, fat16, fat32, hfs, hfs+, jfs, nilfs2, ntfs, reiser4, reiserfs, and xfs).

7) AntivirusLivecd has Midnight Commander (file manager) and Links (text-based web browser), which can be very helpful in some cases:


NOTE: 
AntivirusLivecd is able to make a backup of your data (and to send it to a remote FTP/SFTP server if desired). Just try it yourself by executing 'backup' and 'fsbackup'  commands!

Good luck :-)


Friday, January 11, 2013

WiFi setup in 4MLinux

It's not difficult to setup wireless networking in 4MLinux. Let's do it together now!

Note:

Network Configurator offers the quickest way to connect to your WiFi network:


* * * * *

System-wide Configuration Procedure.
1) Select WiFiScan from the Settings Menu:


2) Now you should be able to see all available WiFi networks (in our example, the network "xenu" has been detected that uses the "wlan0" interface):


3) Select NetConfig from the Settings Menu:


4) A terminal window will be opened. Choose '2' and press Enter:


5) Considering the result of our scanning (see: point 2), you already know that the 'wlan0' interface will be used, so you can choose 'n' and press Enter again:


6) And once again: considering the result of our scanning, you already know that the name of the network is "xenu", so your next answer must be as follows:


7) If you don't know how to answer the next question, then you should choose 'n' (because nearly all networks use dynamic IPs):


8) It is also possible to edit the advanced options if needed. We are skipping this stage now:


 9) It's time to connect to the the Internet.  You can do it by executing the "connect" command in your terminal:


Done!

NOTE:

If your network is password-protected, then you should use WPA Supplicant to configure your WiFi. The only difference will be an option to enter your password (which is "dfgr234!" in the picture below):


Sunday, January 6, 2013

Custom 4MLinux Desktop

You can change the appearance of your 4MLinux desktop just in a few clicks!

1) System monitoring software (Conky) is enabled by default. You can disable it by clicking the ConkyON/OFF icon:


And after your click:


2) Program launcher (Wbar) is enabled by default too. You can disable it by clicking the Wbar On/Off icon:


And after your click:


3) Let's change your wallpaper in 2 clicks :-)  The first one:


And the second one:


Ready!


Note: 4MLinux remembers your settings, meaning that you don't need to repeat this procedure each time when you start X.

Need more options? Continue your reading here.